Click here to read the newsletter!
Monday, June 27, 2011
Etsy Teams Newsletter
I am so freaking excited! The Etsy Teams newsletter for Gay Pride month just went live, and they chose one of *my* photos to showcase! *SQUEEEE!!!!*
Click here to read the newsletter!
Sunday, June 26, 2011
Giveaway!
The Queer Etsy Street Team is doing an awesome giveaway in honor of LGBT Pride Month and because we got 700 followers on Facebook, and it's packed with a lot of great things! My original watercolor postcard, Let Your Love Shine, is just one of them! Do head over to the Queer Etsy Street Team's blog, check out the list of prizes, and leave a comment to enter to win! It's THAT simple! What are you waiting for? CLICK HERE!
Let Your Love Shine
And after you've entered the contest, you can check out some great merchandise by the QuEST folks, at all the great treasuries we've created and listed here! Just click here!
Let Your Love Shine
And after you've entered the contest, you can check out some great merchandise by the QuEST folks, at all the great treasuries we've created and listed here! Just click here!
Saturday, June 25, 2011
How to Make a Mask
Today I'd like to share with you how I made this fabulous mask for the Shine Masquerade Ball last Thursday. Oh, I know there are TONS of tutorials online that tell you how to make masks, but what do you do if you've got to wear glasses like I do? Well if you've checked out as many websites as I did, you may have come to the conclusion that you can paint your face or carry a mask on a stick. Neither are satisfying answers to me. So I got to thinking about it, and here's what I came up with!
Isn't it fabulous? I'd love to make more elaborate ones, and believe me, I have lots of ideas in my head... ~_^ But let me tell you how I made this one!
FIRST, find some cardstock, your favorite color or white. You'll be decorating it later. Put your glasses on the paper, front of the lenses down, and trace all the way around them, making sure to get the the nose piece and the little bumps where the arms stick out. Then put your glasses back on so you can see what you're doing again! XD
NOW you can roughly sketch out your mask; I sketched out where my eye holes should go first, then made sure the eye holes and tabs where the mask would be attached to my glasses were well reinforced. I just took one piece of packing tape and pressed it across the whole area right over my sketched marks. I had trimmed the edges where the tab would be and made sure to fold it over so the tabs would have extra reinforcement. (You can see it in the pics.)
NEXT I folded my paper in half making sure to line everything up so when I cut my mask, it would be symmetrical. You might prefer to have a more free-form mask; if so, skip the folding. Then I used a marker on the tape to draw how I wanted my eye holes to look and cut on that line with a craft knife. Then I used scissors and just cut random curls and waves around the edges. You might prefer to draw it out first, but I was impatient. ^-^ Be sure to make holes on the tabs for your mask to slip onto your frames! I used a 1/4" hole punch, but something a bit more rectangular probably would have worked better.
FINALLY you can decorate your mask however you want. I sketched out some feathery swirly shapes and things and used watercolor pencils and LOTS of glitter glue on mine. When we got to Shine there were some gems and feathers available, so I added some of those too. Whatever you do, make sure to leave the lower half not too much wider than your frames so they can be put on without mishap. (I learned the hard way and lost some feathers the first time I tried to put it on.)
NOW comes the tricky part: slipping it on your frames. Take your glasses off, and hold the mask upside down to your glasses, the insides facing each other, and slip the tabs over each of the ear pieces. Slide the mask down to meet then lenses and then you need to do a little finagling to flip the mask right side over on the front of your glasses. I hesitate to give more details here, because everyone's glasses are slightly different and it might not work the same. However, since it's made of paper, and has been well reinforced, it's capable of being curled and bent a bit to get it in place. Just be careful of your decorations!
Additional tips:
- Mod-podge works awesome to keep everything glued on and still flexible.
- If your mask seems to flop out from your face a bit too much, try gluing a popsicle stick or coffee stirrer across the inside of the brow to help keep it flat.
- Have fun and send me pics!
Friday, June 24, 2011
Wednesday, June 22, 2011
EtsyBloggers BlogCarnival: Favorite Summer Recipes
Our EtsyBloggers Team Blog Carnival this time is: What is your favorite summer recipe? Please share with us!
I've answered this one before; I *love* sharing my favorite summer recipes! My absolute favorite special summer meal is Pepper Steak, Salt Potatoes, and Corn on the Cob, and I love the summertime sweets, Pfijit and Clementine Cake...
As many families do, we cook out a lot in the summer, and usually it's hot dogs or whatever meat was on sale, and we eat a lot of tossed salads, especially when it's hot. Marshmallows are a staple, usually roasted, and just last week, Jacqueline introduced us all to dough boys. It is SO easy and SO tasty! I wish I had taken some pics of it, but truthfully, I was too busy stuffing my face; so many thanks to Krista at The Nourishing Apron for this great shot!
We used crescent rolls, but many people use biscuit dough, and yes, those refrigerator tubes work just fine if you don't want to make your own dough. There are SO many variations, but basically you wrap the dough around your stick, making sure to pinch the ends so it stays stuck on, then rotate it over hot coals until it's browned nicely on the outside.
Be careful over flames, because it can burn quick and still be raw inside. Of course, be careful with your *self* around the fire, and let it cool some before you eat it!
And do try some of the variations! You can dip the dough in cinnamon & sugar before wrapping it around the stick (chocolate croissant anyone?); if you can pull it off the stick in one piece, you can fill the hollow with a string cheese stick, let it melt a bit, and dip in marinara sauce; you can fill the hollow with chocolate chips (or another favorite meltable) or pie filling; or you can do what I did, roast your hot dog over the fire til it's almost done, then wrap your dough around it and cook it til the dough it done! I meant to tuck some cheese in, but got impatient and ate the cheese while roasting my dog. Hehehe...
What's your favorite summer recipe? Let me know then head over to the EtsyBloggers team blog for all the other EtsyBloggers' faves!
Etsy Blogger of the Month: tamdoll
Say hello to June's Blogger of the Month...
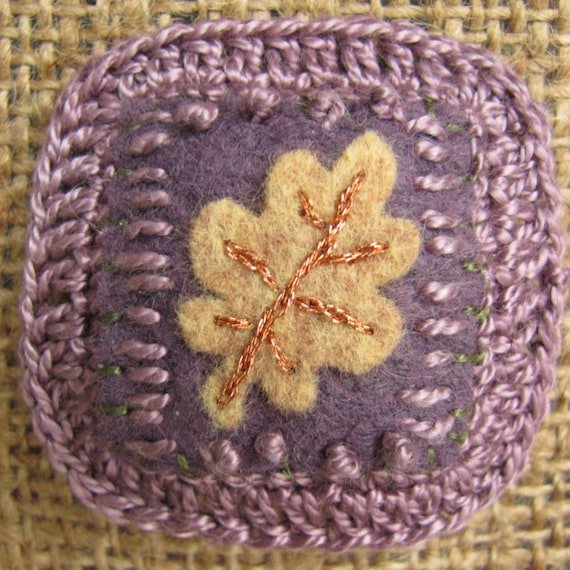
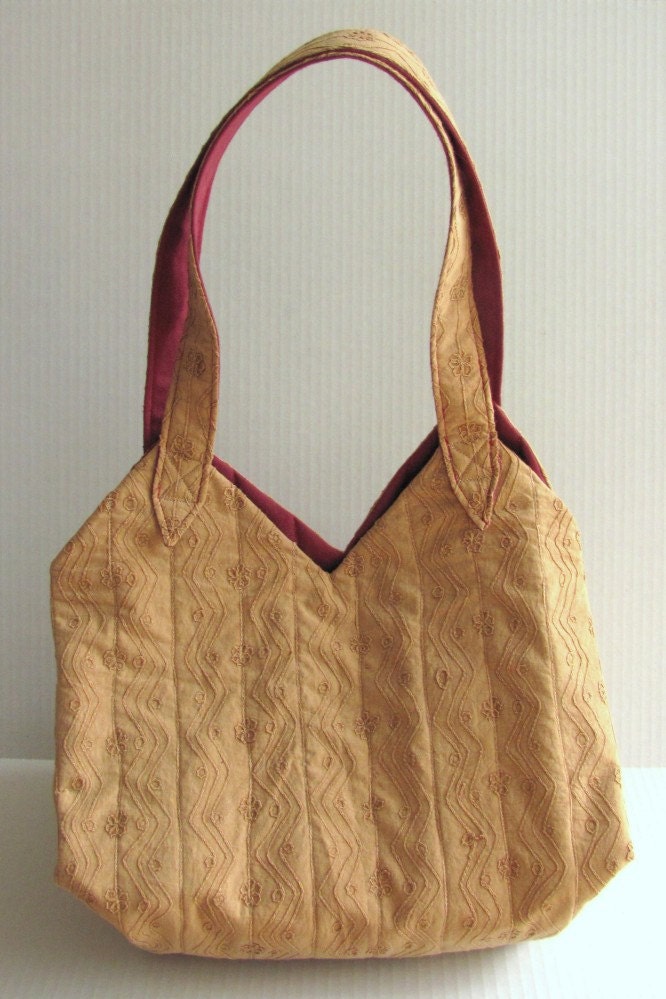
Tammy Gross of Tamdoll's Silver Mountain Originals creates wonderful pieces of wearable art, unique one of a kind accessories, and even offers patterns for you to make your own inspired creations! Here are some of my favorites...
This one's been in my favorites for a LONG time...
Lilac Oak Leaf Tiny Brooch of Wool Felt
I'd love to make this...
Serenity Mermaid Pattern for Cloth Dolls
This would be a great bag to have!
Huge Hobo Bag - Great Textured Fabric Shoulder Bag
Don't forget to check out her shop and blog, and see what's there that might be calling to you...
FAE Exhibition: Return to Renaissance
Aquariann has done it again! She's gathered together some of the best of the FAE Team work, and created a lovely exhibition. This month's theme is Return to Renaissance ^-^
Click the banner above to see the full exhibition, but here's a little sample:
Etsy Buy Handmade FAEetsy |
Thursday, June 02, 2011
TiLT: Blessings & Blissings
Short list cuz I'm sleepy... but oh so grateful for the good things in my life...
♥ Blessings: JACQUELINE! Lia, Antonio, JoAnn, Esme, my camera, this computer, the internet, Ibuprofen & Naproxen, falling gas prices, Etsy sales! Hannah the Montana, food in my belly, comfy bed to sleep in, people who care about me.
Oh do go see it here!
♥ Blissings:Showers of maple tree seed pods, red cows in a field of yellow flowers, blue skies with puffy white clouds racing by, cool breezes that make the wind chimes sing, lazy hazy summer days spent under shady trees or at the lake shore, dragonflies zipping about the yard like mini-helicopters, open-face s'mores, grilled portobello mushrooms topped with roasted onions & peppers, baked beans, SPARKLY NAILS! Magic shell! Birds who pose for me. Navi-systems, Sirius radio, NPR.
Things I Love Thursday is brought to you by Gala Darling...
Wednesday, June 01, 2011
Wishcasting Wednesday
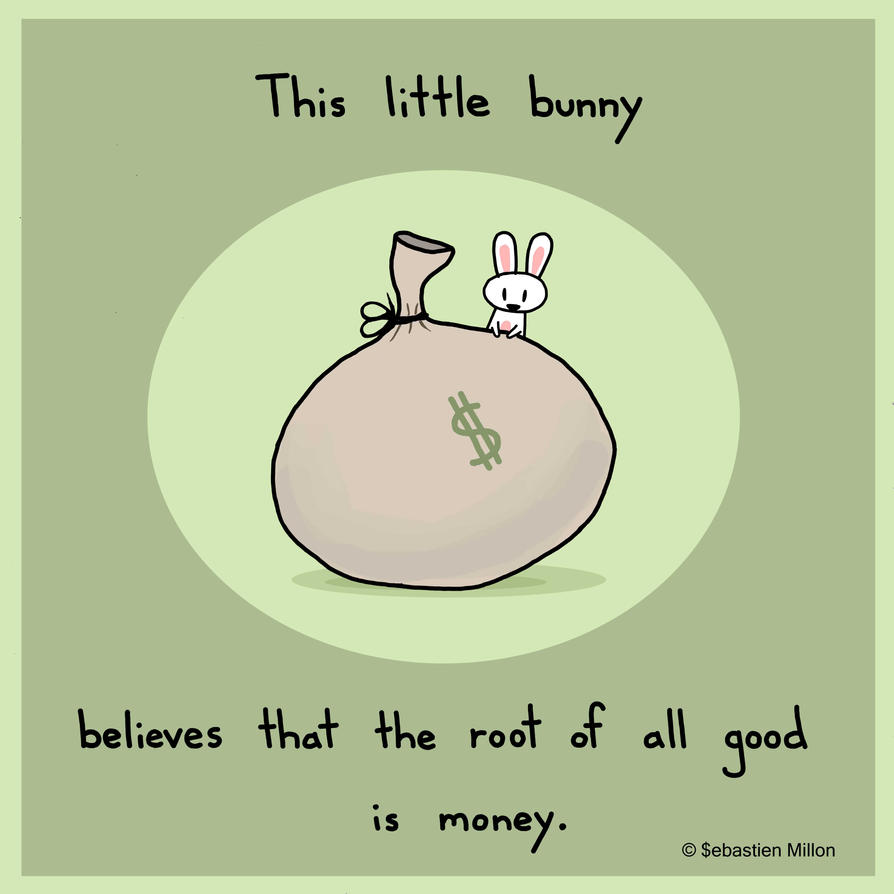
What is your money wish?
Money. by $ebastien Million
I am wishing desperately for there to be more of it. Short for rent, still owe on electricity, not to mention the others... only 15 more days of the school year to sub, and we still need money for Shine (gas & deposit), and I wish we had enough to buy the kids the things they want/need (swimsuits for Es & Jo, more of the food they want to eat, more art supplies, more make-up/nail polish/cleansers/conditioners/etc for teen-aged girls...), money to get them all wherever they want to go...
Most of the time I just trust that the money will come and things will work out just like it should, but sometimes, I start wallowing in the things we don't have money for, that I want us to be able to do, and I get anxious and so sad & worried... I wish money weren't such a scarcity in our house... And yet at the same time I realize how much we have compared to so many other people, that this wish along brings such guilt! I am not complaining! But I still do wish for more...
You can be a maker of magic and a tender of wishes. It’s easy. Answer the wish prompt on your blog and then add a direct link to your post in the box [at the link] below. Support wishes by visiting other participants, leaving a comment saying “As (insert name) wishes for her/himself, so I wish for her/him also.” It’s that simple. There is great power in wishing together.
~ Jamie Ridler
Subscribe to:
Posts (Atom)